How to Fix, the “Untrusted Domain” error in NextCloud in Docker Portainer.
When initially installing NextCloud or similar containers, users may encounter the issue of untrusted domains or IPs. Fortunately, there is a straightforward solution that should work even if you are unsure about your file structure.
Step One, Identify Your File Location
If you already have Portainer installed on your Docker, then it’s super easy to access. Head over to your dashboard and log in.
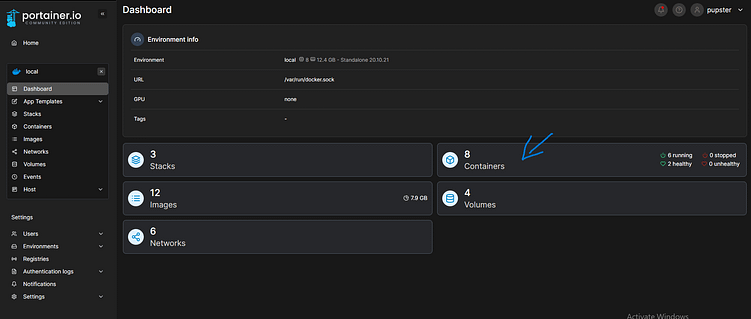
In Your Dashboard, proceed to your container List as indicated in the Image below.

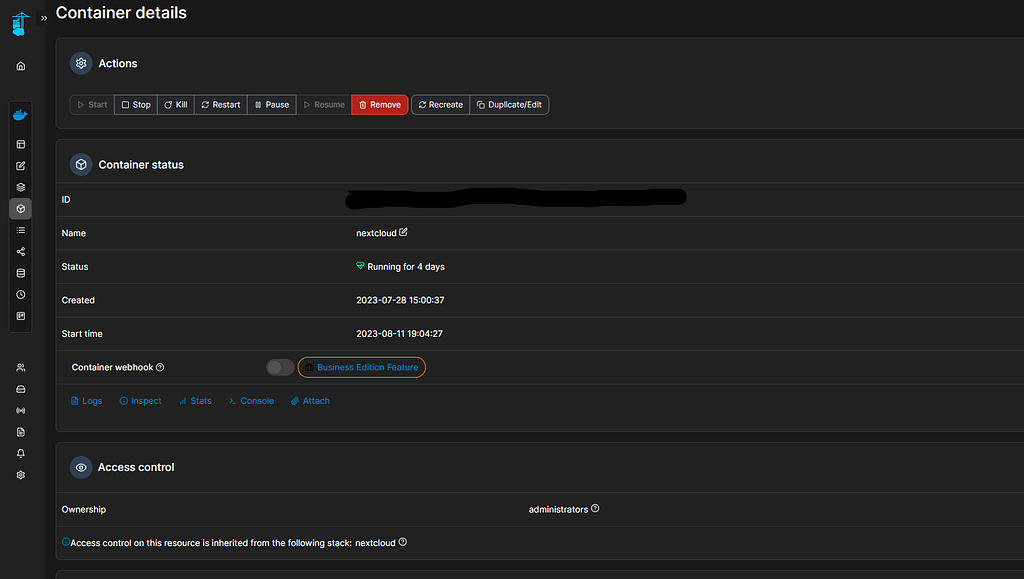
You will see a list and layout similar to the one shown below. (Please note that the image is partially obscured.) To proceed, click on “NextCloud” (which is underlined with a green line) on the page depicted below. If Nextcloud is not present in your list, Still continue with the steps outlined below. If you have found NextCloud And Have Clicked it, skip to Point A

If you are unable to locate “NextCloud” in the list, it could be possible that it is listed under a different name. To find out which name it is listed under, you can use your IP address and log in to specific ports until you come across Nextcloud. Typically, Nextcloud is hosted on ports such as 8080, 8181, 81, or 80.
Point A
After, Clicking on NextCloud, The Page presented should look like the one below.

Scroll Down All the Way down until you reach the “Volumes” Section

Please take note of the file structure indicated by the arrow as it will be necessary for editing the Config.Php file. It is possible that the file structure for your Config Directory may differ from the one shown above.
SSH Into Server (or Terminal)
Once you are in your Terminal or SSH, use the following commands. Disregard any { or [ or ( as those are used to help you distinguish elements or parts of a command.
Do /sudo
Enter Your Password
Do the following commands in order
/sudo nano {Insert the directory pointed by the arrow in the image}/config.php
Example Using My File Structure:
/sudo nano /containers/cloud/nextcloud/config/config.php
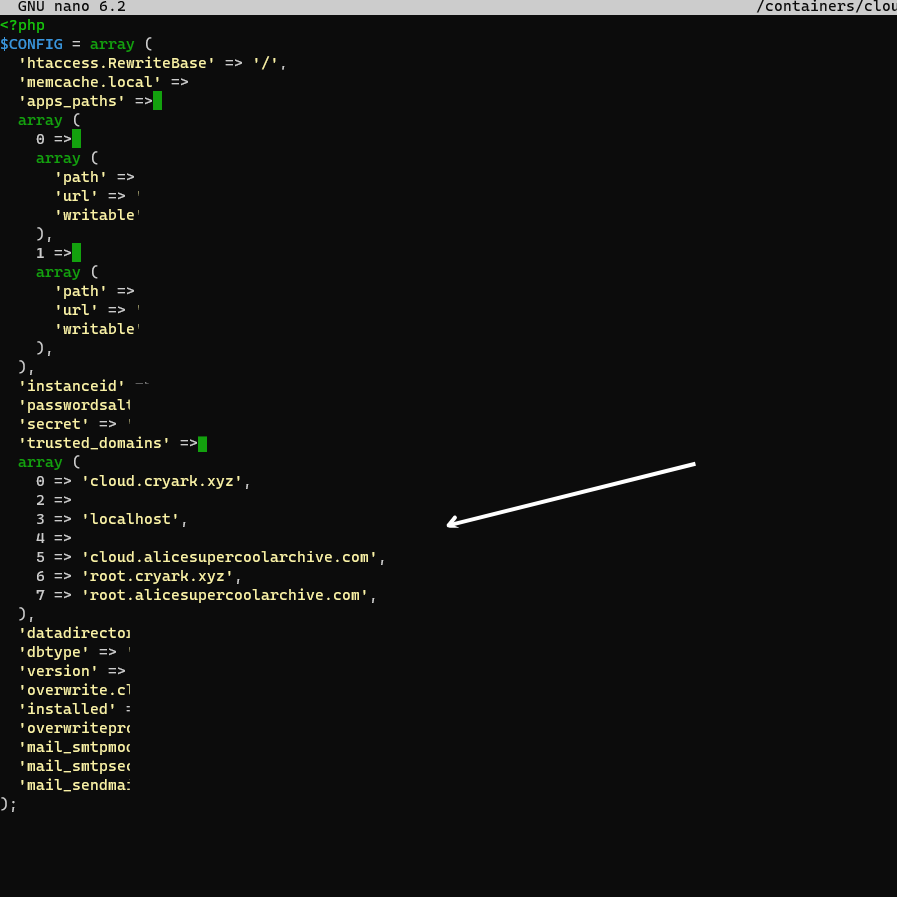
You Should be presented with a screen like the one above, (part of the image is blocked off).
Continue down to the “Trusted Domains” Section. Your List is likely smaller than ours, Probably only around 3 total items.
#{Number of the Item in the List} => '{Your Domain Or IP}',
Example Using Our Above Image:
#8 => 'AwesomeUrl.Com',
After Your Done Editing, Press Control X and select Yes.
Please take note to respect the indentations when editing. It is important to match the length of spaces in lines similar to the ones you are editing. For instance, if #1 had 2 spaces before the “=>”, ensure that your line also has 2 spaces.
Congratulations! You should now only need to refresh the page or clear the cache of your browser.
